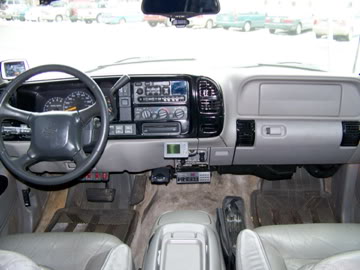
nubuilder
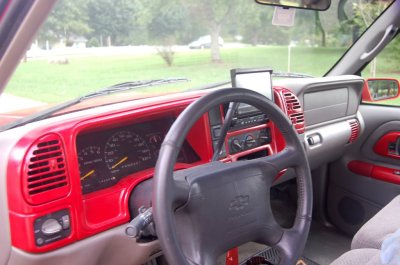
Why buy new when you can restore?
Alright. Put on 3 coats of Adhesion Promoter. On the 2nd coat, I had something like 6 or 7 runs in it. Little clear/white balls. I'm hoping that between the Filler Primer and sanding, you won't be able to see them  . I ran out of filler primer last night
  (only got 2 coats on) so I had to run and get more this morning . I put on 2 or 3 more...I can't remember (fumes must be getting to me). The parts are now sitting on their 8-9 hour dry. Then I'll go over them LIGHTLY with 600 grit to smooth them all out, wipe them down (again) with isopropyl alcohol and start spaying paint. I'm guessing 3-4 coats of paint and another 3-4 clear.
PICS!!!
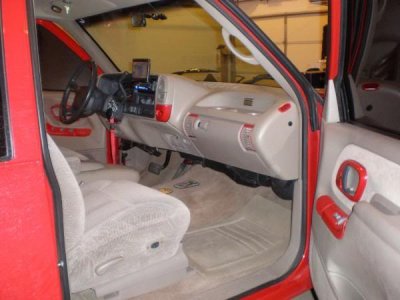
My "workshop" - you can kind of see all the overspray on the floor; it comes right off just walking on it and sweeping it

I taped the hell out of the back of this so no paint got through. Now that I think about it, it was probably a waste of time.
You can see my 3 holes for switches and my hole for my AUX input jack (I had to grind down the plastic on the backside of the AUX because the nut on it was only on 1 thread; now its on 3).

I couldn't get the thing off that moves the air deflectors on the one vent, so I'm going to have to wait for it to dry, adhesion promoter it, and prime it.

I taped the entire backside of the fuse cover just so nothing got on it.

I only painted the front of the cup holder. Taped close to the face then used paper to cover the rest. I tried to paint the vent moving things too.

Things I'm worried about:
1) a nice finish to the dash trim bezel
2) how well the paint will hold up on the air vents with the moving sliders to direct the airflow
. I ran out of filler primer last night (only got 2 coats on) so I had to run and get more this morning . I put on 2 or 3 more...I can't remember (fumes must be getting to me). The parts are now sitting on their 8-9 hour dry. Then I'll go over them LIGHTLY with 600 grit to smooth them all out, wipe them down (again) with isopropyl alcohol and start spaying paint. I'm guessing 3-4 coats of paint and another 3-4 clear.PICS!!!
My "workshop" - you can kind of see all the overspray on the floor; it comes right off just walking on it and sweeping it
I taped the hell out of the back of this so no paint got through. Now that I think about it, it was probably a waste of time.
You can see my 3 holes for switches and my hole for my AUX input jack (I had to grind down the plastic on the backside of the AUX because the nut on it was only on 1 thread; now its on 3).
I couldn't get the thing off that moves the air deflectors on the one vent, so I'm going to have to wait for it to dry, adhesion promoter it, and prime it.
I taped the entire backside of the fuse cover just so nothing got on it.
I only painted the front of the cup holder. Taped close to the face then used paper to cover the rest. I tried to paint the vent moving things too.
Things I'm worried about:
1) a nice finish to the dash trim bezel
2) how well the paint will hold up on the air vents with the moving sliders to direct the airflow